Have you ever watched someone build a balloon garland and thought, “That doesn’t look too hard.”
Then, five minutes later, they’re talking about 260s, balloon clusters, quads, a decorating strip and glue dots like everyone already knows what those are.
Balloon decorating isn’t something that takes years of practice or a degree to get started. You do need a little patience and a willingness to learn a new skill, though. It’s like any hobby or creative business. Like when you were learning to paint with watercolors or crochet your first blanket.
The internet is full of talented balloon decorators sharing their work, but they often skip over the little details. Even when they’re sharing a beginner tutorial, they skip small things because they forget what it’s like to be a beginner. They’ve done it thousands of times.
– What’s a 260?
– Why are they using tiny balloons?
– How do they make the balloons stay together?
– Why didn’t they use ribbon?
– How do they get that shape?
Those little questions are exactly where your learning begins.
I’ve found that one of the best ways to learn balloon decorating isn’t by buying a cart full of supplies. It’s by watching experienced decorators work, asking lots of questions and following every little rabbit hole until things start to click.
That’s exactly what we’re going to do in this guide.
Instead of trying to become an expert overnight, we’re going to slow down and learn how balloon decorators think. Once you understand the basics, those fast-paced tutorials suddenly make a lot more sense.
Let’s start with the words you’ll hear over and over again.
Learn the Balloon Language First
If you’ve watched more than a few balloon videos, you’ve probably heard terms that sounded like another language.
“Use a 260.”
“Make a quad.”
“Add some five-inch balloons.”
“Attach it to the decorating strip.”
If you’ve ever paused a video just to Google one of those phrases, you’re not alone. I did the same thing.
Here’s the funny part.
Once you learn a handful of balloon terms, you’ll understand far more of what you’re watching. It’s a little like learning a few cooking terms before following a recipe. Suddenly everything makes more sense.
You don’t need to memorize dozens of definitions. Start with the basics.
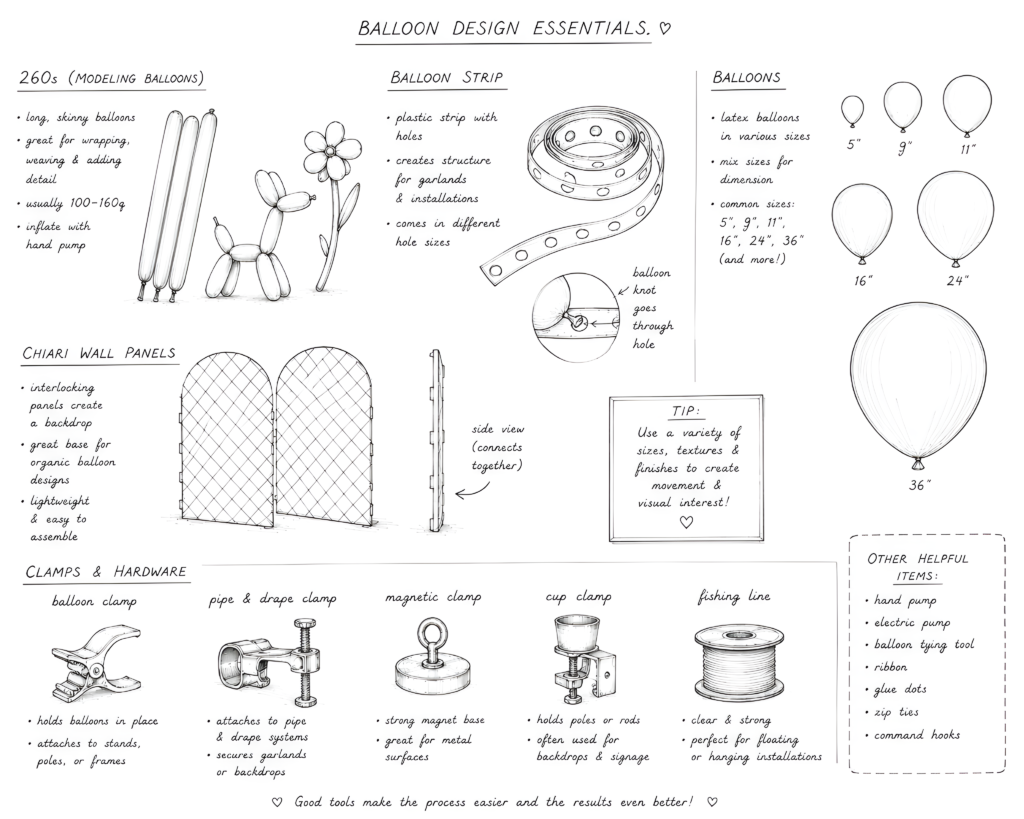
260 Balloon
This is the long, skinny balloon most people associate with balloon animals. Balloon decorators often use 260s to tie balloon clusters to arches and frames because the latex grips other balloons better than ribbon. They’re also useful for attaching specialty balloons or adding small decorative details.
Balloon Cluster
A balloon cluster is simply a group of balloons tied together. Most balloon garlands are built by connecting clusters instead of individual balloons. Most balloon decor builds from one cluster to the next.
Balloon Decorating Strip
This flexible plastic strip has evenly spaced holes that hold balloon knots in place. It’s one of the easiest ways to build a balloon garland, and once it’s covered with balloons, you won’t even notice it’s there.
Organic Balloon Garland
The word organic doesn’t refer to the balloons themselves. It describes the style. Organic balloon garlands use different balloon sizes to create a more natural, flowing look instead of perfectly even rows.
You don’t have to remember every term today. Just becoming familiar with them will make tutorials much easier to follow.
How Balloon Garlands, Arches and Banners Are Actually Built
Building a balloon display can look a little overwhelming. There’s balloons and walls and words and lights. Balloons seem to appear out of nowhere.
They use a machine to blow up the balloons. Push them through some strange box, and bam, they end up with a beautiful arch or garland.
Once you understand the basic process, it’s much less complicated than it looks.
Every balloon artist has their own style, but most balloon garlands are built using the same five basic steps.
Step 1: Inflate Balloons in Different Sizes
One of the first things you’ll notice is that decorators don’t inflate every balloon to the same size. That’s intentional. Using different balloon sizes creates movement and depth. Instead of looking stiff and perfectly uniform, the finished garland has a softer, more organic look.
If you’ve ever bought balloons, you’ve probably seen packages labeled 5-inch, 11-inch or 18-inch. Those numbers tell you the approximate size the balloon can reach when it’s fully inflated.
Most balloon garlands use a combination of sizes.
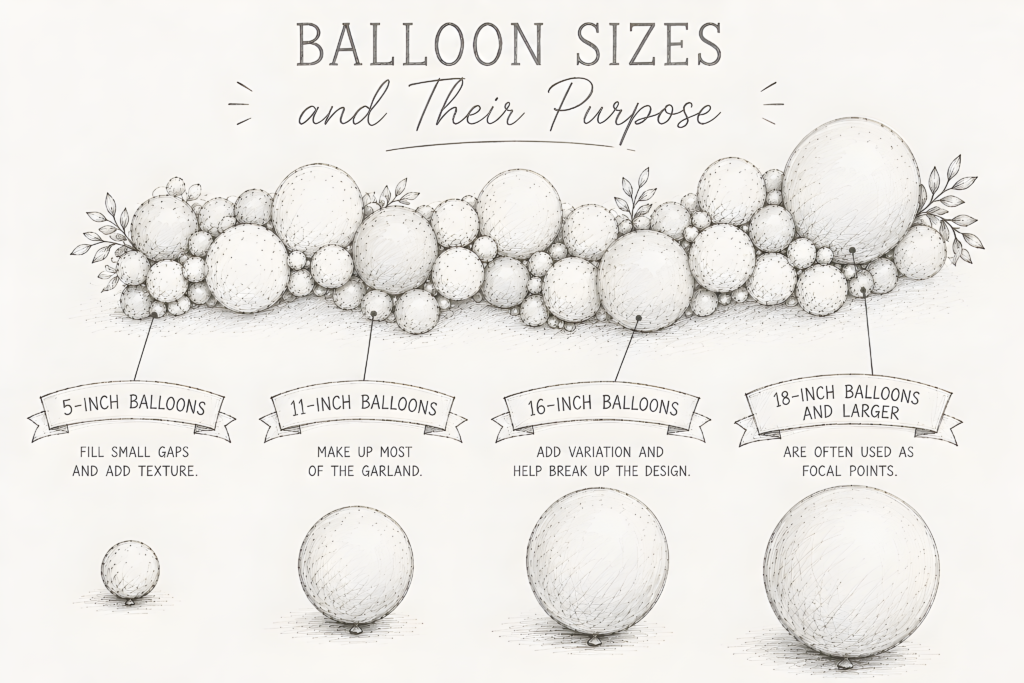
• **5-inch balloons** fill small gaps and add texture.
• **11-inch balloons** make up most of the garland.
• **16-inch balloons** add variation and help break up the design.
• **18-inch balloons and larger** are often used as focal points.
Here’s something that surprised me while I was learning. Just because a balloon is sold as an 11-inch balloon doesn’t mean decorators always inflate it to 11 inches. They often underinflate balloons on purpose to create several different sizes while using the same package of balloons.
Step 2: Use a Balloon Sizing Box
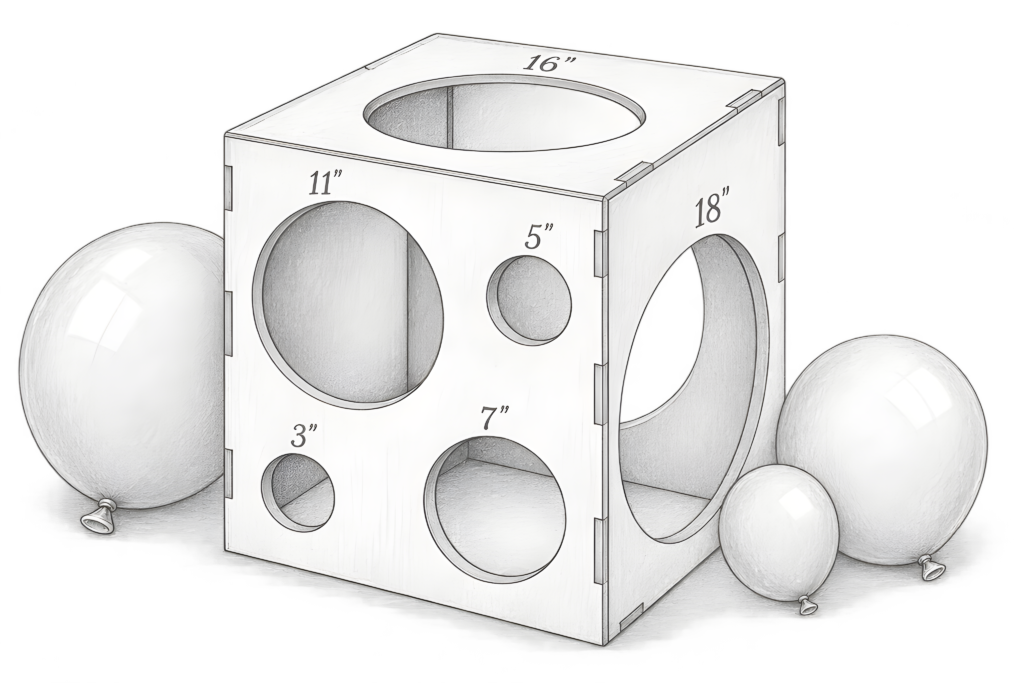
If decorators are making balloons in several different sizes, how do they keep them consistent? They use a balloon sizing box.
A sizing box is simply a box with circles cut into it. After inflating a balloon, decorators gently check it against the correct opening before tying it. If the balloon is too large, they let out a little air. If it’s too small, they add a little more.
It sounds simple, but it makes a huge difference. When your balloons are all the size you intended, your balloon clusters fit together much more neatly and the finished garland looks more professional.
The good news is you don’t have to buy one right away. Many decorators make their own sizing box from a cardboard box or a plastic storage bin with circles cut into it.
Step 3: Build Balloon Clusters
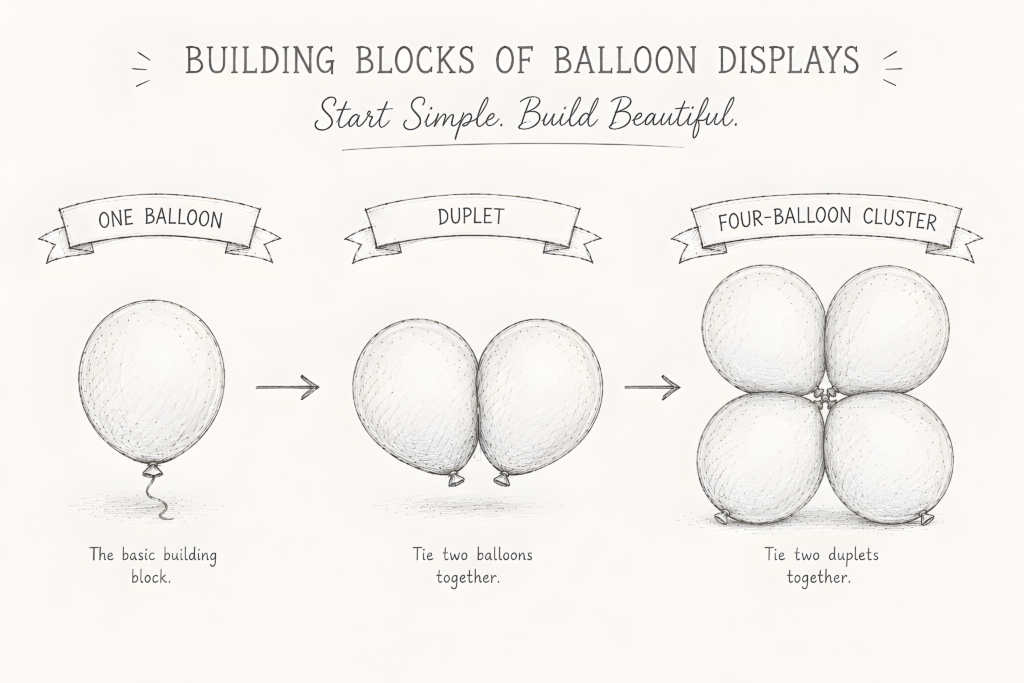
Here’s another thing that confused me at first.
I assumed balloon decorators tied one balloon after another until they had a garland. That’s not how it works. Instead, balloon garlands are built from small groups of balloons called **clusters**.
Most decorators begin by tying two balloons together to create what’s called a **duplet**. Then they twist two duplets together to create a four-balloon cluster. A quad.
Those four-balloon clusters become the building blocks of the entire garland. Once you understand that, balloon tutorials suddenly make much more sense because you realize you’re repeating the same simple step over and over again.
Step 4: Build the Garland
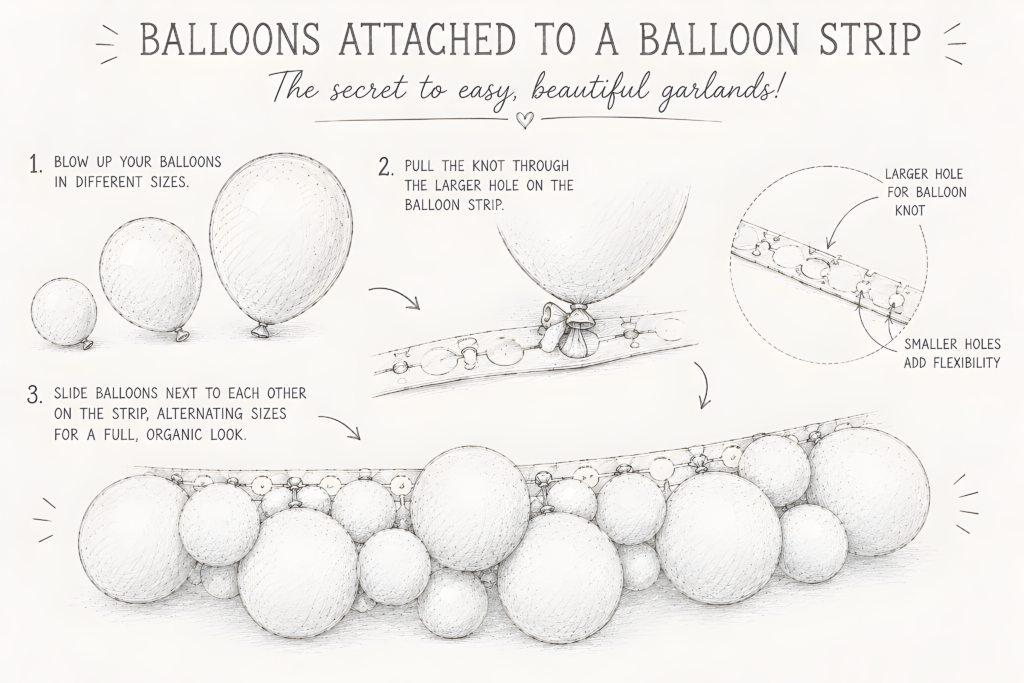
Once several balloon clusters are finished, they’re attached to balloon decorating strip.
Balloon decorating strip is a flexible plastic strip with evenly spaced holes. The knots from each balloon cluster slide into the holes, allowing the garland to grow one cluster at a time.
At first, the strip looks very obvious. Don’t worry about that. As more balloons are added, it becomes almost completely hidden.
This is also when decorators begin turning and rotating the balloon clusters to create a fuller shape. The goal isn’t to make every balloon point in the same direction. It’s to spread the balloons out so the garland looks balanced from every angle.
Step 5: Add the Finishing Touches
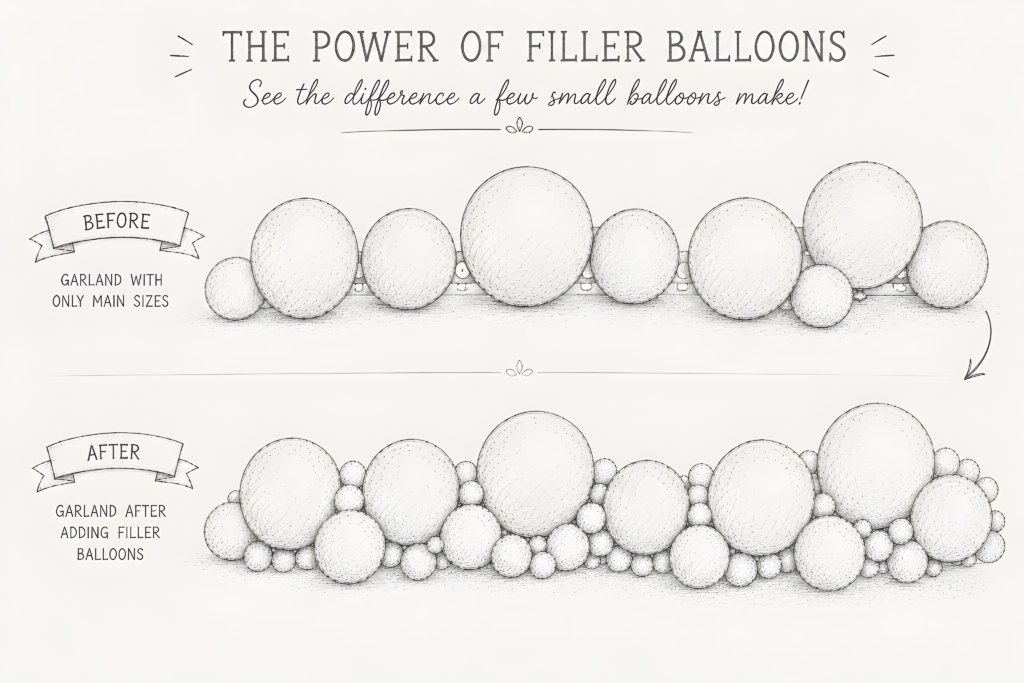
Once the basic garland is finished, it’s time to fill in the gaps.
Most decorators use smaller balloons to fill empty spaces and make the garland look fuller. Depending on the style, they might also add greenery, flowers or specialty balloons to match the event.
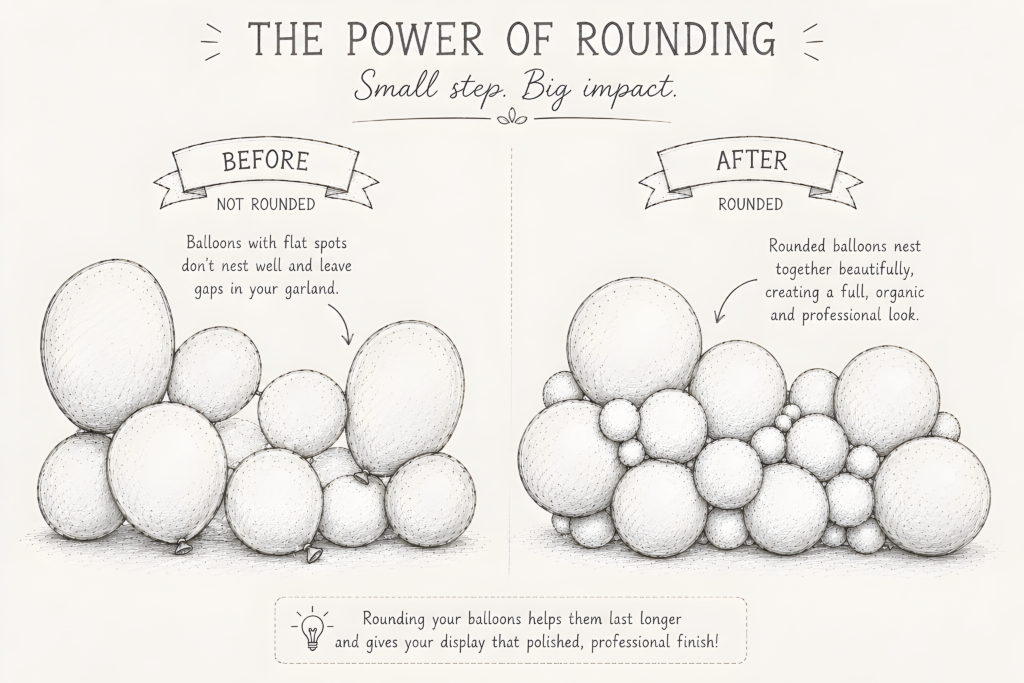
One little trick that surprised me was how professional balloon garlands always seem to have perfectly round balloons.
I assumed professionals were using a different type of balloon. In many cases, they’re not.
After inflating a balloon, many decorators gently press the tip of the balloon to soften the pointed end. It only takes a few seconds, but it creates a rounder balloon that gives the finished garland a softer, more polished look.
Another helpful trick is using a **260 balloon**. Even though it’s the same long balloon used for balloon animals, decorators often use it behind the scenes because latex grips latex better than ribbon. A 260 balloon can wrap around an arch frame or another balloon without sliding around.
They’re also useful for attaching specialty balloons. Instead of taping a custom balloon directly to the garland, many decorators tape it to a 260 first. The 260 is then wrapped around one of the balloons in the garland, making it easy to position the specialty balloon exactly where they want it.
Once you understand these basic steps, balloon decorating starts to feel much less intimidating. Every tutorial you watch will be a little easier to follow because you’ll recognize what’s happening behind the scenes instead of wondering how everything magically came together.
Practice Your First Balloon Garland
Now that you understand how a balloon garland is put together, it’s time to make one yourself.
Don’t worry about creating a giant arch for your first project. Start small. A simple five or six-foot garland is enough to help you learn the process without using hundreds of balloons.
As you work, you’ll probably notice that your first few clusters don’t look exactly alike. That’s completely normal. Balloon decorating is one of those skills that gets easier with repetition. The more clusters you make the more natural the process becomes.
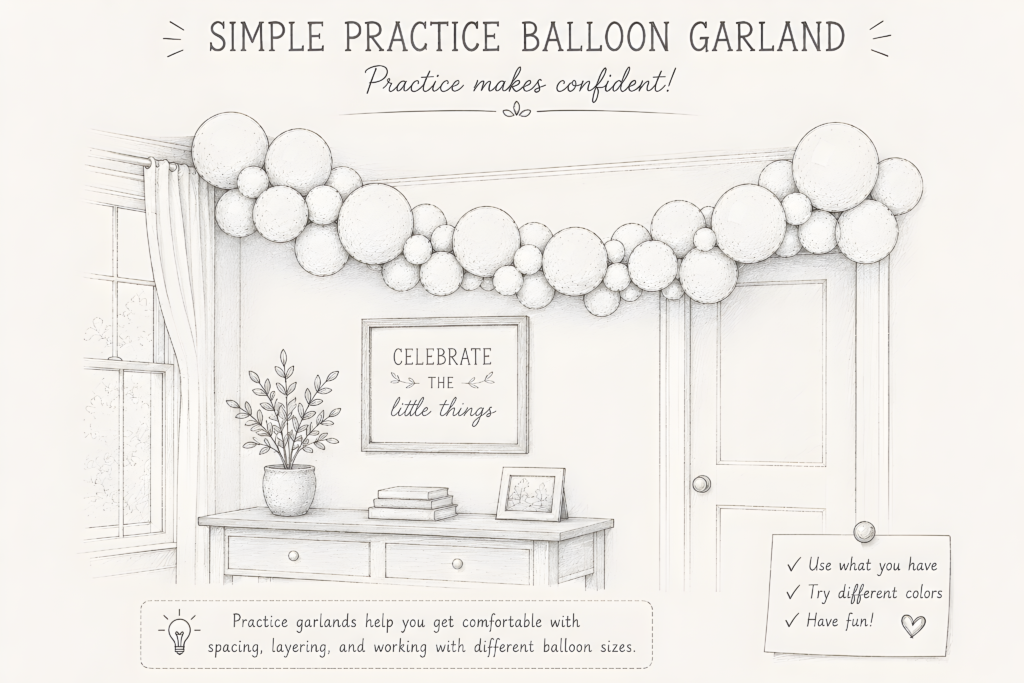
Try to focus on learning one step at a time instead of worrying about the finished design. Practice inflating balloons to consistent sizes. Get comfortable twisting clusters together. Learn how the decorating strip works. Once those steps begin to feel familiar, you’ll naturally become faster and more confident.
Don’t be afraid to take your garland apart when you’re finished. You can often reuse the decorating strip and many of the balloons if they haven’t popped, giving you another chance to practice without buying all new supplies.
One of the best ways to improve is to make the same garland several times. The first one teaches you the process. The second one feels easier. By the third or fourth attempt, you’ll probably notice you’re spending less time thinking about each step and more time enjoying the creative part.
Learn One Technique at a Time
Once you’ve made your first balloon garland, it can be tempting to jump straight into giant arches, balloon walls and elaborate event displays. Try not to rush.
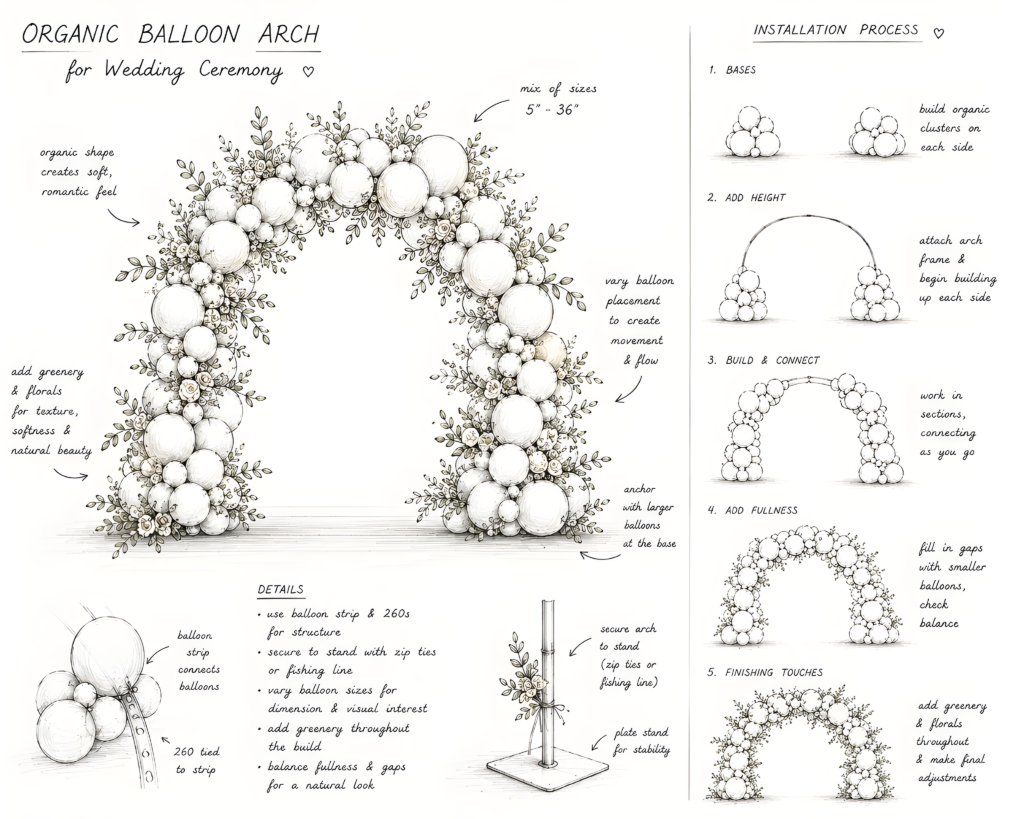
Almost every experienced balloon decorator started with the same basic skills you’re learning now. They became comfortable making balloon clusters, building garlands and working with different balloon sizes before moving on to more advanced designs. Think of each project as another building block.
After you’ve made a few garlands, you might try adding specialty balloons or greenery. From there, you could learn how to build a freestanding balloon column or decorate a backdrop. Before long, you’ll realize that many balloon designs use the same techniques in different ways.
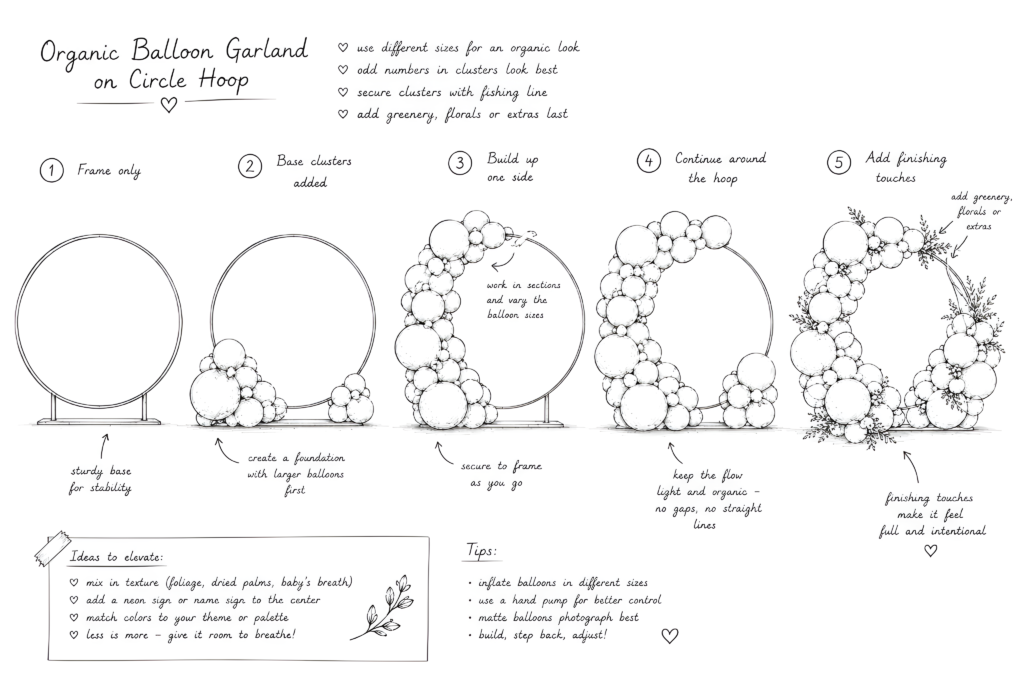
One of the nice things about balloon decorating is that every project teaches you something new. Maybe this time you learn how to make your balloon sizes more consistent. Next time you might create smoother color transitions or discover a faster way to build your clusters.
Those small improvements add up quickly.
Save photos of every balloon garland you make, even if you don’t think it’s your best work.
A few months from now, you’ll be able to look back and see how much you’ve improved. It’s also a great way to build a portfolio if you decide to start taking clients in the future.
Final Thoughts
Learning balloon decorating can feel overwhelming when you’re first getting started. There are new terms to learn, supplies you’ve never seen before and techniques that seem complicated until someone explains them.
The good news is that every experienced balloon decorator started exactly where you are now. No one picked up a balloon pump and instantly knew how to build beautiful garlands. They learned the terminology, practiced making balloon clusters and slowly became more confident with every project.
Give yourself permission to be a beginner. Your first garland doesn’t have to be perfect. The goal is simply to learn something each time you practice. Before long, you’ll recognize the techniques professionals are using, understand why they make certain choices and start developing your own style.
Once you’re comfortable making balloon garlands, you might start wondering what comes next.
How do you find your first clients?
How do you know when you’re ready to charge for your work?